Case Data Selector
Case Data Selector allows you to add patient information, calibration data, film images, and data analyses from a saved file, or directly from a scanner. Each object added to the tree is dependent on the objects above it.
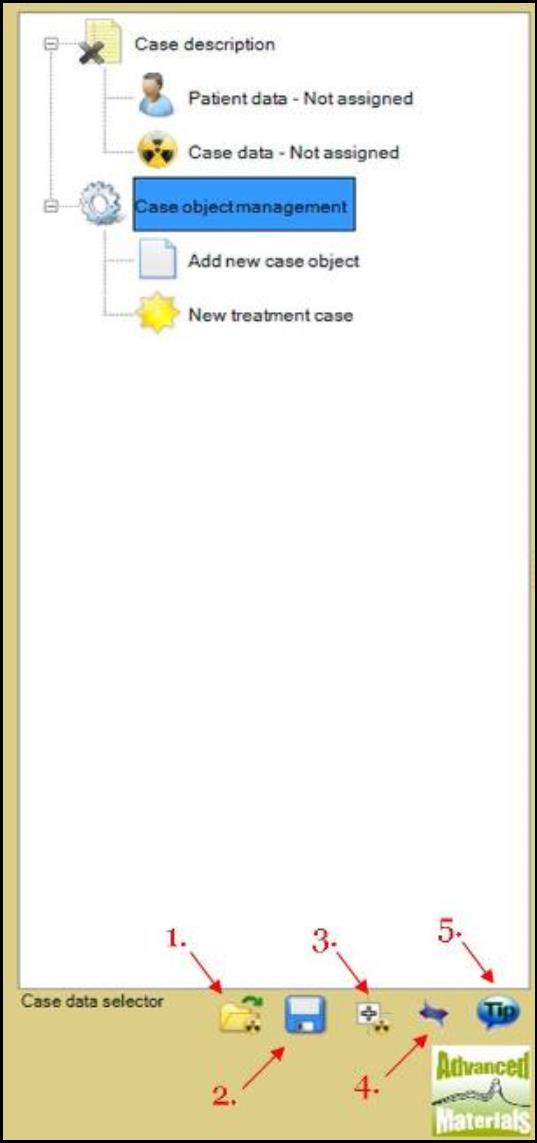
- Select “Open” button to open treatment case from file.
- Select “Save” button to save treatment case to the computer. This saves all the objects opened in the case data selector as one case.
- Select “Expand” button to expand only the selected treatment object tree node.
- Select “Scanning Parameters” then
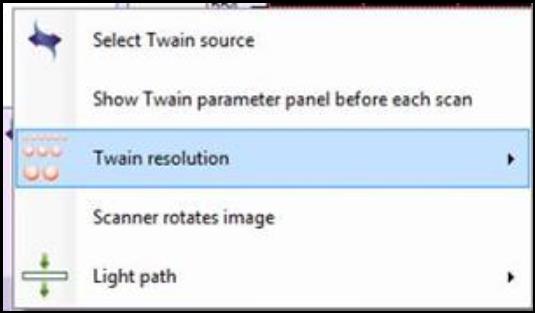
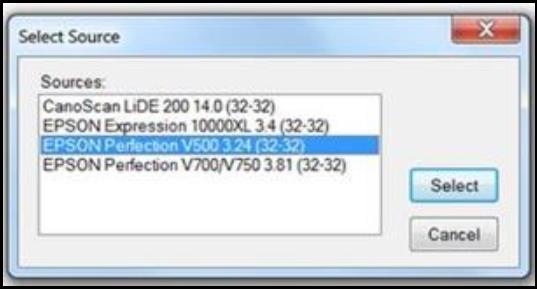
- Choose “Select Twain source” to choose the desired scanner. The “Select Source” window will pop up. Choose the appropriate scanner to scan.
- Check “Show Twain parameter panel before each scan” to have the model specific scanner panel open each time when scanning using FilmQA™ Pro.
- Select “Twain resolution” to change the spatial resolution of the scans.
- Select “Scanner rotates image” to rotate the image 90 degree to match the scanner information. This feature is used for some scanner drivers which would auto rotate the image without rotating the device information, e.g., Epson combined with Windows XP.
- Select “Light path” to choose between the reflective mode and the transmissive mode for the scanner.
- Select “Tool Tip” button to show or hide all the tool tips. “Case description” allows you to identify patient data and his
“Case description” allows you to identify patient data and his/her associate case data.
- The “Patient data” drop down list allows you to select the patient preferred to view. Click on the icon and select the appropriate patient name or “
” to deselect any data selected previously. Select
to open the “Patient Data Window.”
- The “Case data” drop down list allows you to select the preferred case specific to the patient selected under “Patient data” drop down list. Double click on the icon to open the “Case Data Window” and select the preferred case in “Case list.” The “Patient data” will be changed to match the patient name of the treatment case selected.
“Case object management” allows you to add objects to the case selected in “Case description” and to create calibration data.
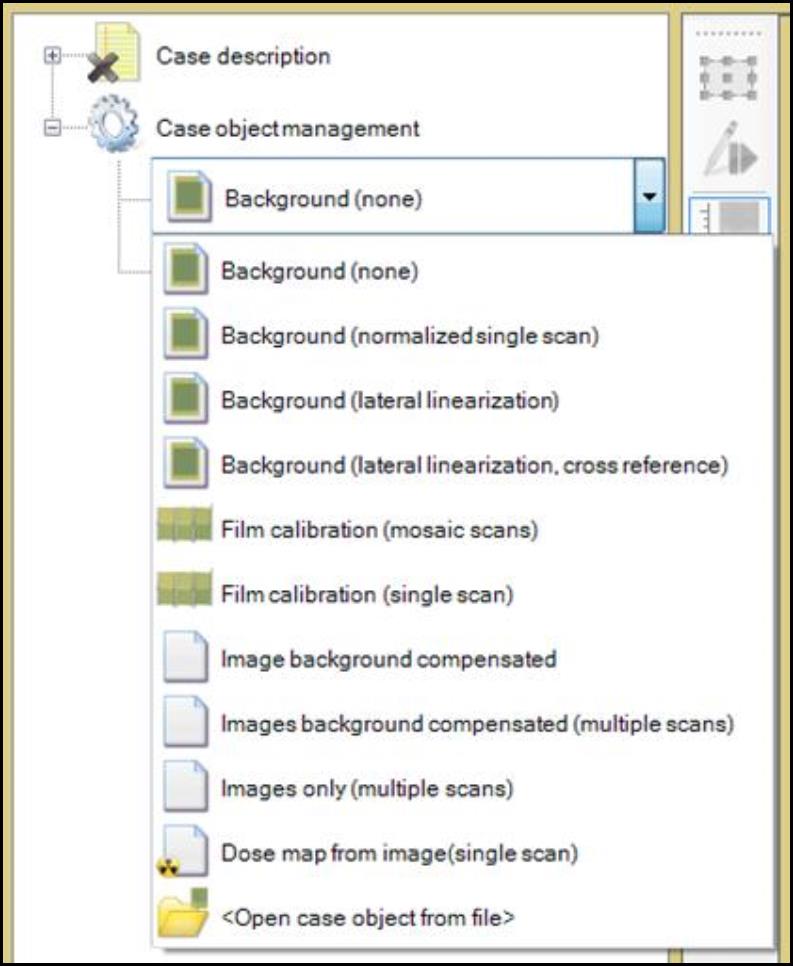
- “Add new case object” drop down list allows you to select different types of new object to add to the treatment case. Below is a brief description of the object selection on the list:
- The “Background (none)” option produces an empty background which creates no compensation of scanner effects to the case.
- The “Background (normalized single scan)” option allows you to scan a blank film to correct for scanner effects.
- The “Background (lateral linearization)” option allows you to scan films to correct for lateral scanner non-linearity.
- The “Background (lateral linearization, cross reference)” option allows you to scan films to correct for the non-uniform thickness or unevenly exposed EBT film stripes in addition to the lateral scanner non-linearity.
NOTE: See detail instructions for each background selection under “Background” section.
- The “Film calibration (mosaic scans)” option allows you to scan multiple film patches of known exposure to create calibration function.
- The “Film calibration (single scan)” option allows you to scan one film with multiple regions of known exposure to create calibration function.
Note: See step-by-step instructions of obtaining calibration data under “Calibration” section.
- The “Image background compensated” option allows you to apply background selected to an image to correct for different effects based on the background selected.
- The “Images background compensated (multiple scans)” option allows you to apply background select to multiple images to correct for different effects based on the background selected.
- The “Images only (multiple scans)” option allows you to scan images without any specification.
- The “Dose map from image (single scan)” option allows you to create dose map derived from exposed film using background correction and calibration.
- The “<Open case object from file>” option allows you to open case object from file.
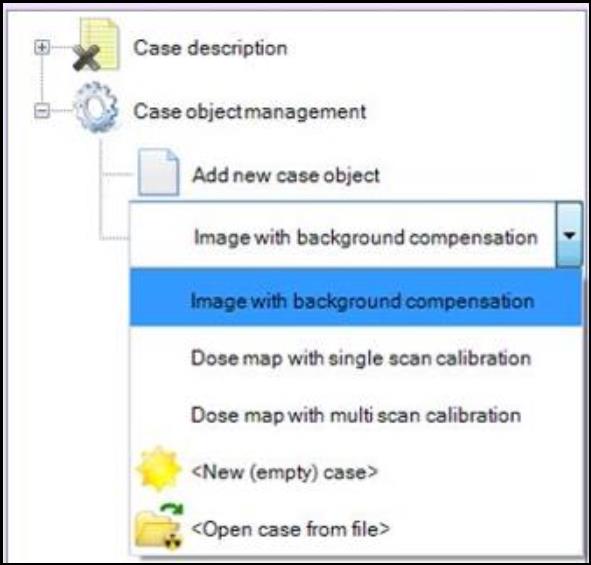
- “New treatment case” drop down list allows you to select a template of objects to create a treatment case. Below is a brief description of the template selection on the list:
- The “Image with background compensation” template creates both the “Background (normalized single scan)” and the “Image with background compensation” to the panel.
- The “Dose map with single scan calibration” template creates the “Background (normalized single scan),” the “Film calibration (single scan),” and the “Dose map from image (single scan)” to the panel.
- The “Dose map with multi scan calibration” template creates the “Background (normalized single scan),” the “Film calibration (mosaic scans),” and the “Dose map from image (single scan)” to the panel.
- The “<New (empty) case>” option erases everything opened under “Case Data Selector.” * The “<Open case from file>” option allows you to open case from file.