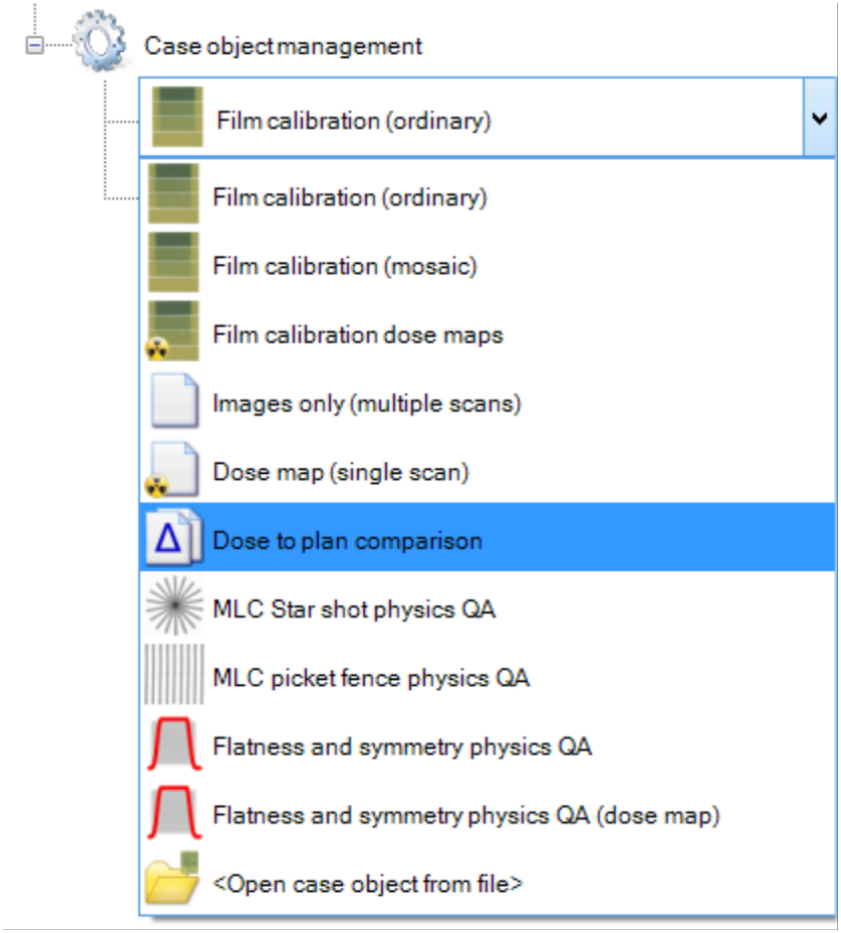
Add a “Dose to plan comparison” object to your case.
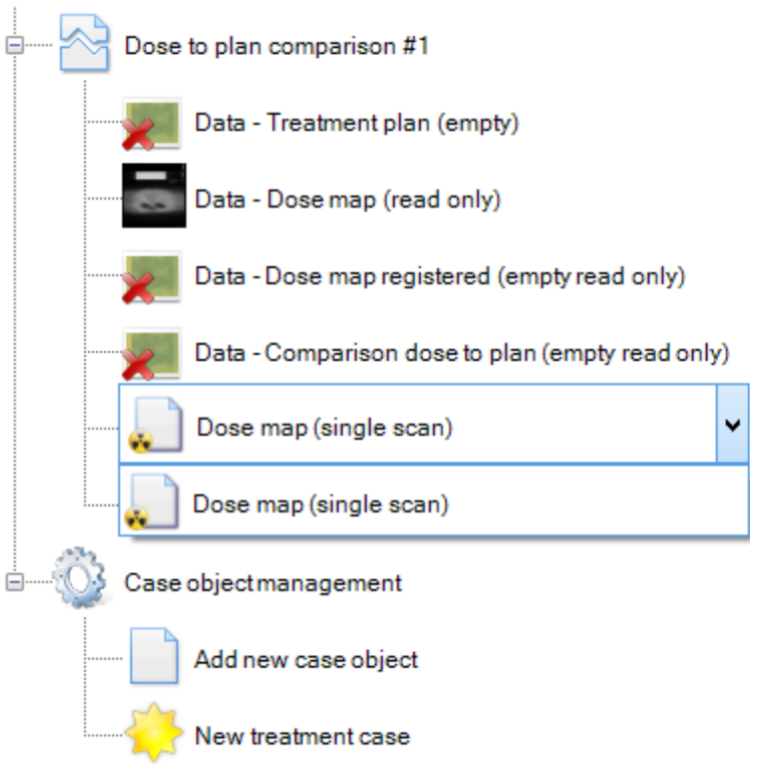
At least one valid dose map object must be available in the case. The dose map should have fiducials assigned to allow an image registration.
By default the first available dose map in the case is assigned. One can select from the “Dependence - Dose map” combo box any available dose map in the case as shown below.
To load the Treatment plan, right click the “Data—Treatment plan” icon ..
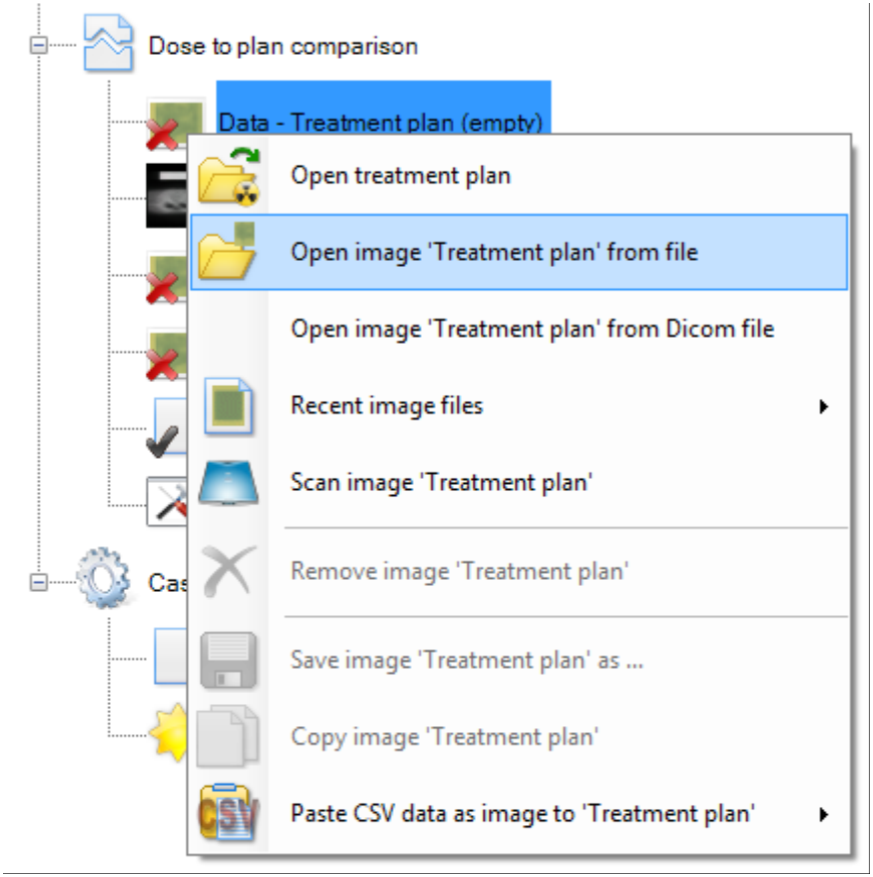
... and select one of the following 4 options:
See also Available Images Formats in FilmQA Pro.
If the isocenter is Not assigned, FilmQA Pro assumes the image center is the isocenter of the plan.
In case of the RapidArc example, the treatment plan is stored as tif file, i.e. use the “Open image from file” option to load the plan.
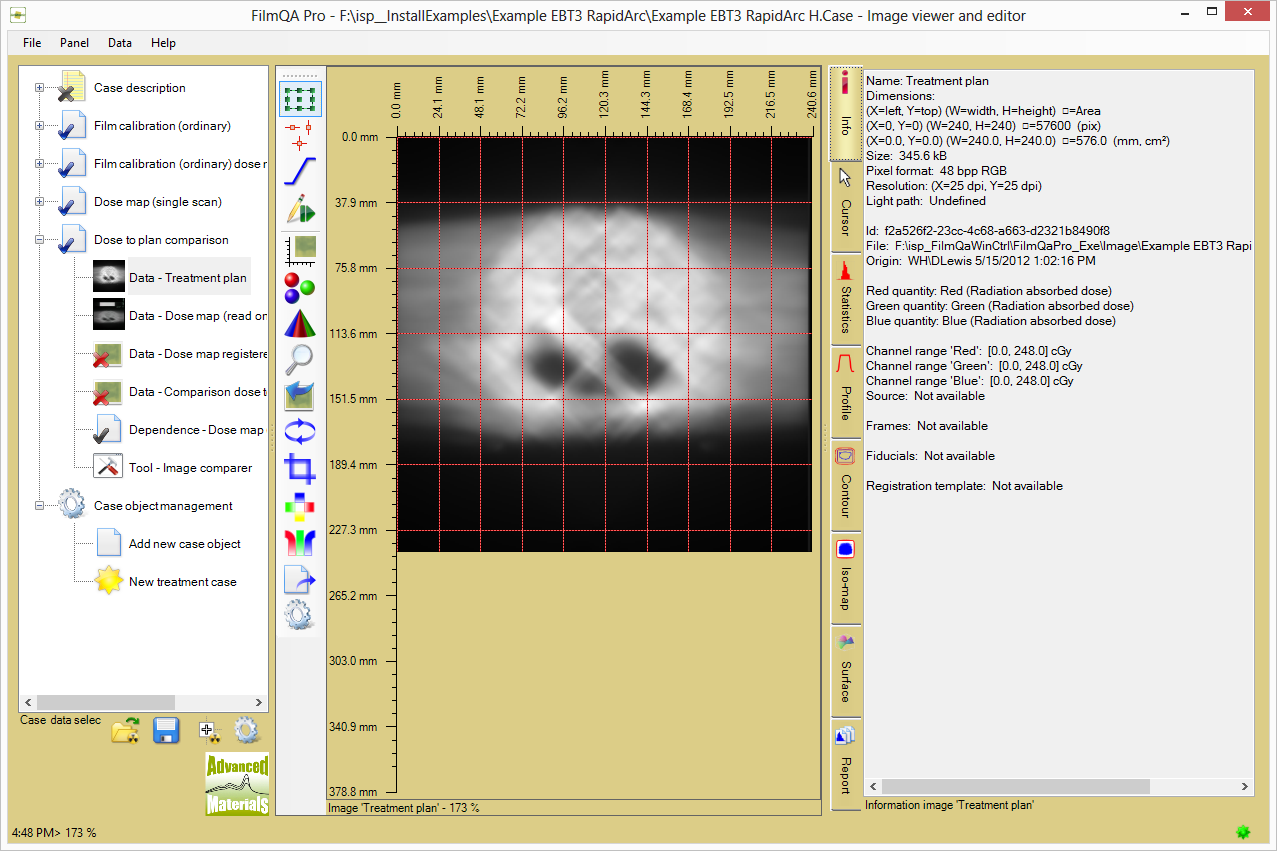
The example screen should look like shown below.
Select the “Tool - Image comparer” in the case data selector to start the image comparer. The fiducials assigned in the dose scan are fitted automatically to the coordinates of the isocenter. The fiducial fit can be also invoked using the “Fiducial fits” button  as shown below.
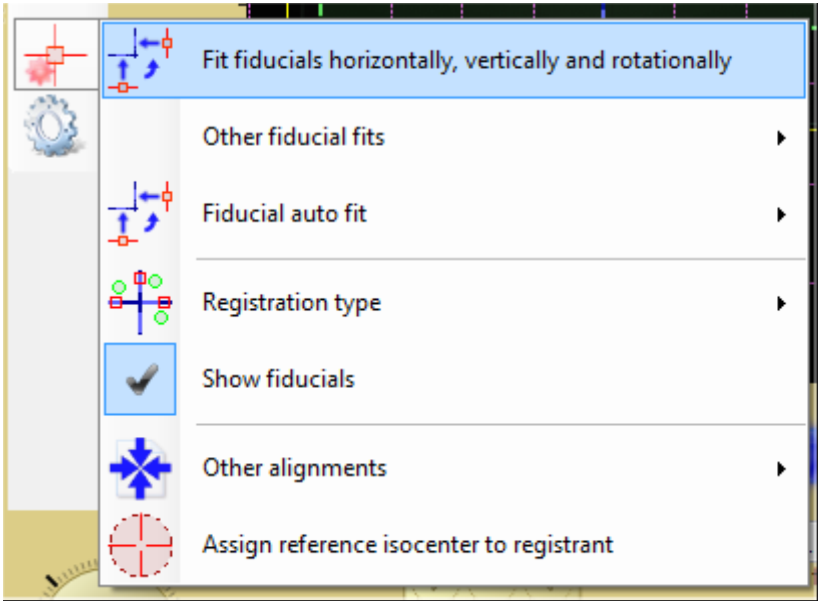
The isocenter fit requires that the dose map is roughly assigned, i.e. flipping and 90° rotations must be correct so that the quadrants have the right orientation. Use the  button to select rotation and flipping as shown below.
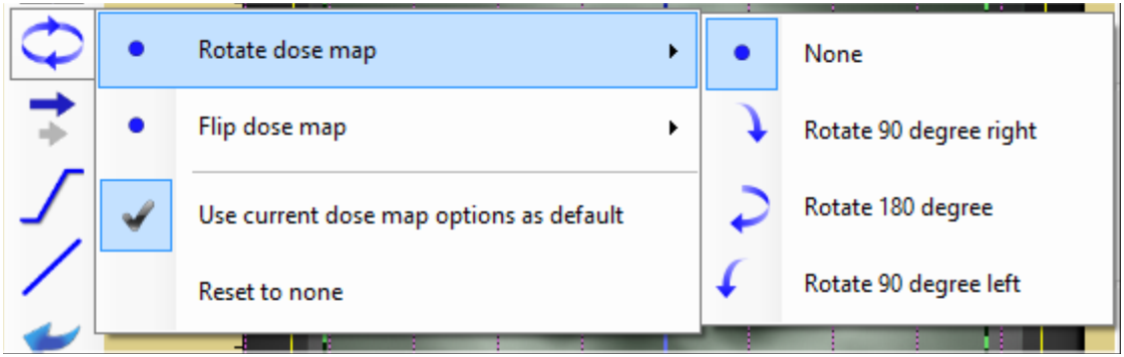 Rotate and flip the dose map prior to the registration. The rotation is carried out first, then the flipping.
Other registrations methods are available.
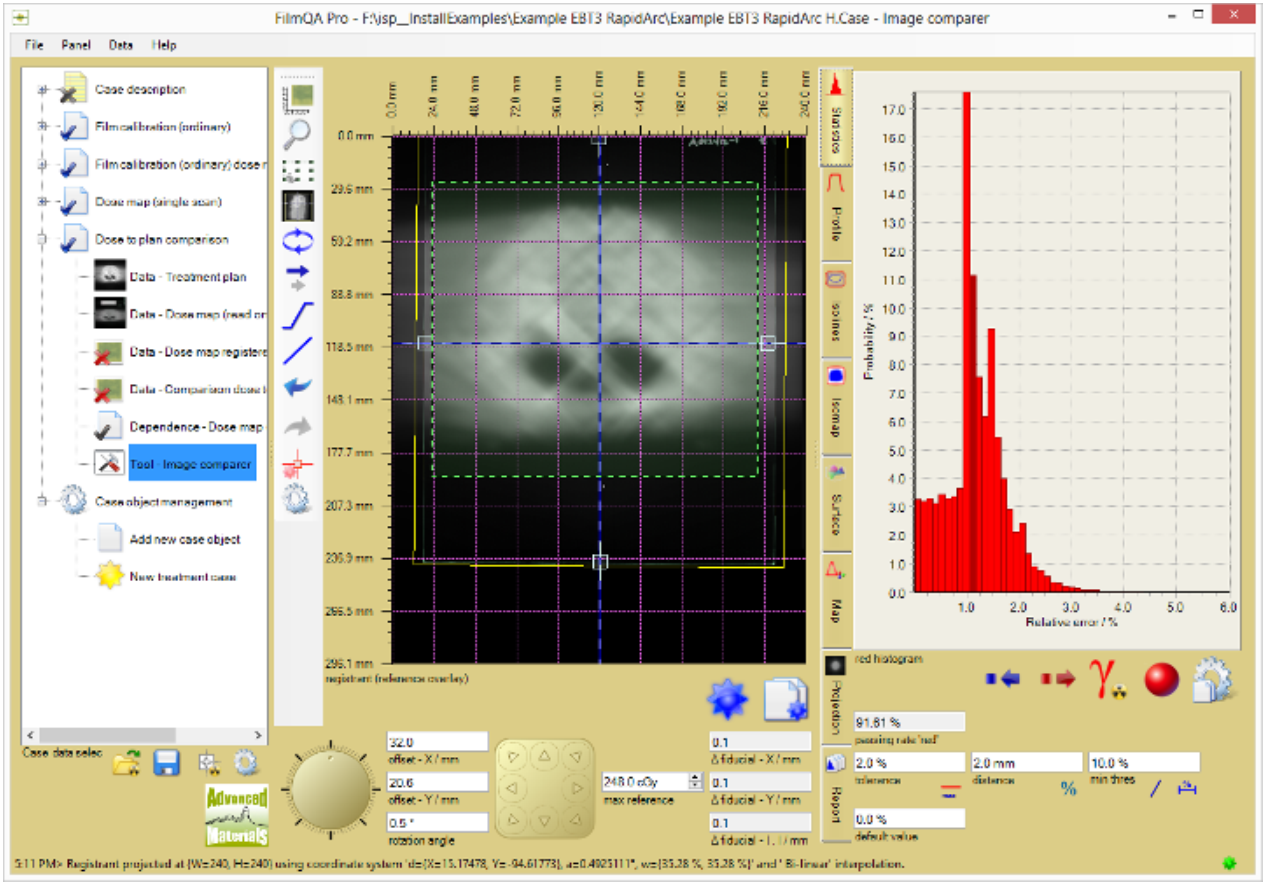
The example screen should look like shown below.
Use the rotation and step pad underneath the center image to adjust dose map position
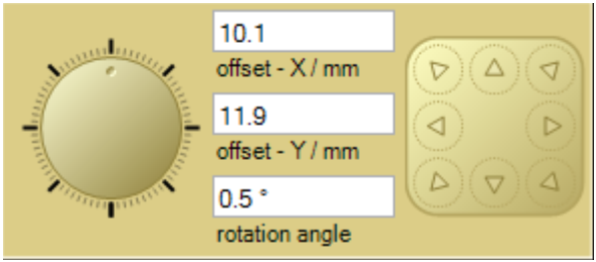
The step size can be changed by toggling the  button—right click this button for more step size options.
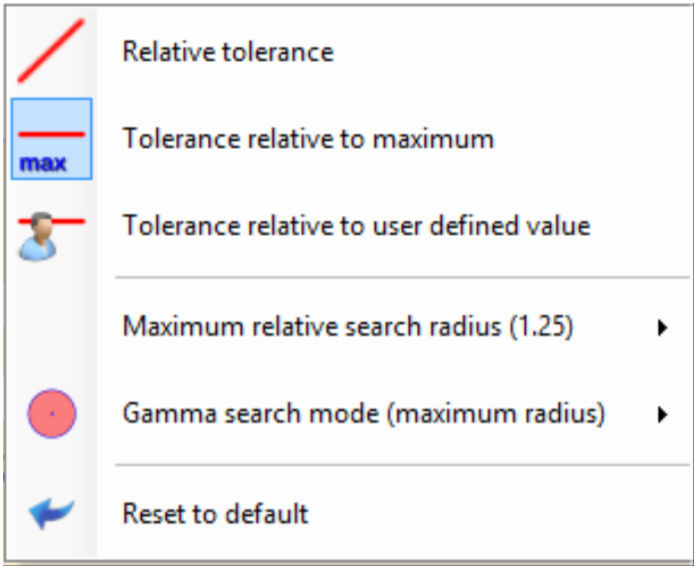
The “Δ fiducial” block shows the average offset between isocenter and fiducials in x and y direction as well as the absolute distance—right click for additional options.
An efficient way to find the dose map position that maximizes passing rate is displaying the isolines of both images (select “Isomap” tab) and adjusting the dose map position with small steps.
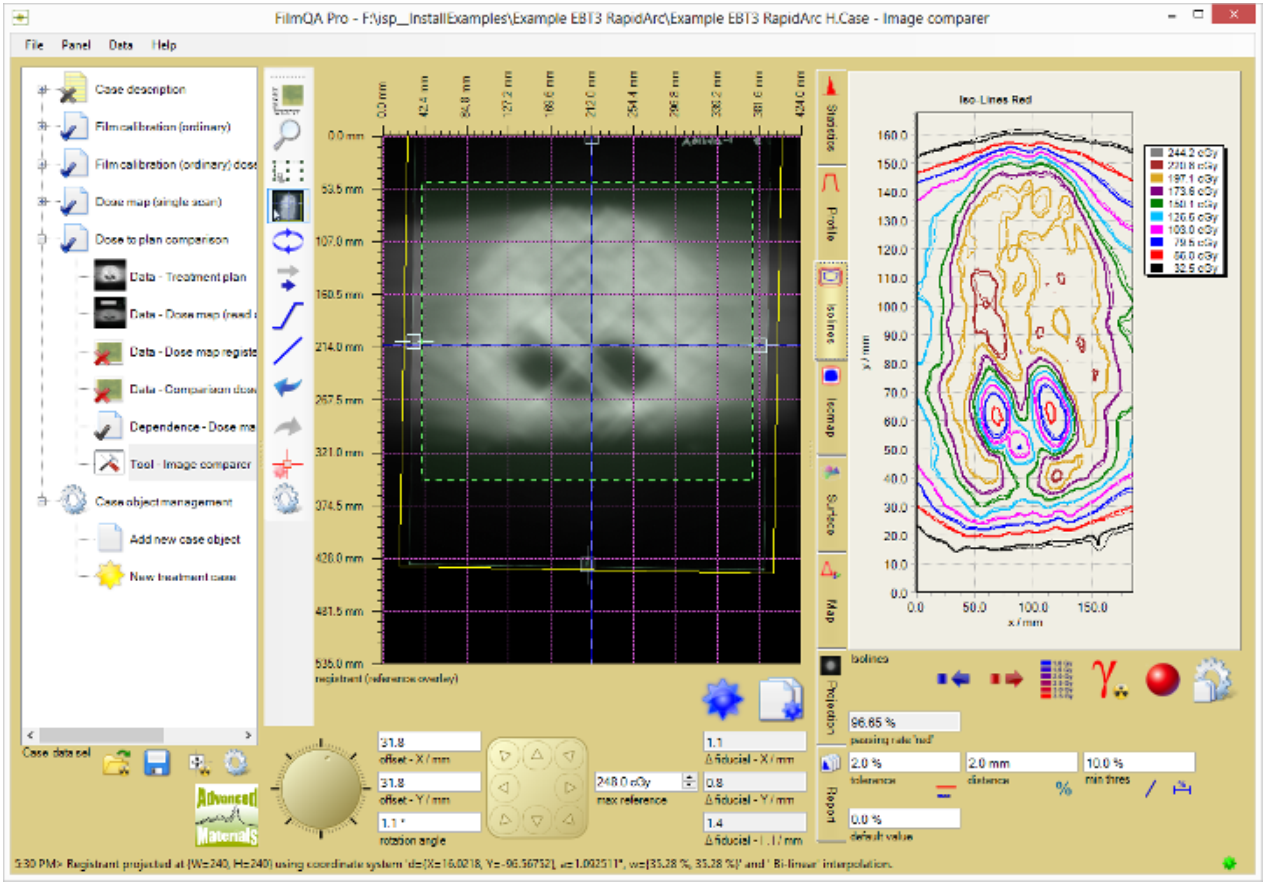
For the RapidArc example a passing rate of ~97% at 2% / 2 mm (99.9% at 3% / 3 mm) can be reached as shown above.
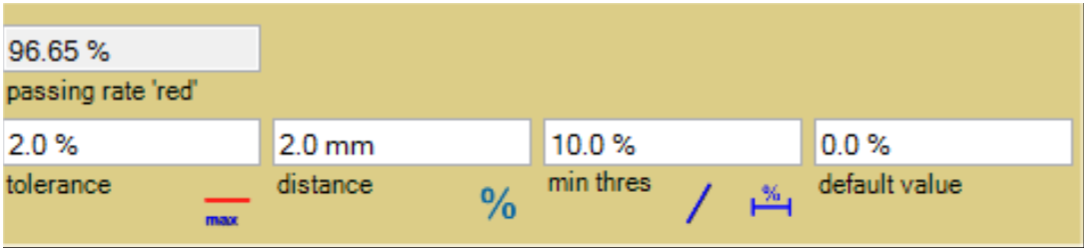
The comparison map parameter are displayed at the right lower part. For the gamma function the parameter are as follow:
If the final results are displayed a report can be generated, just select the “report” tab to display the corresponding report as shown below
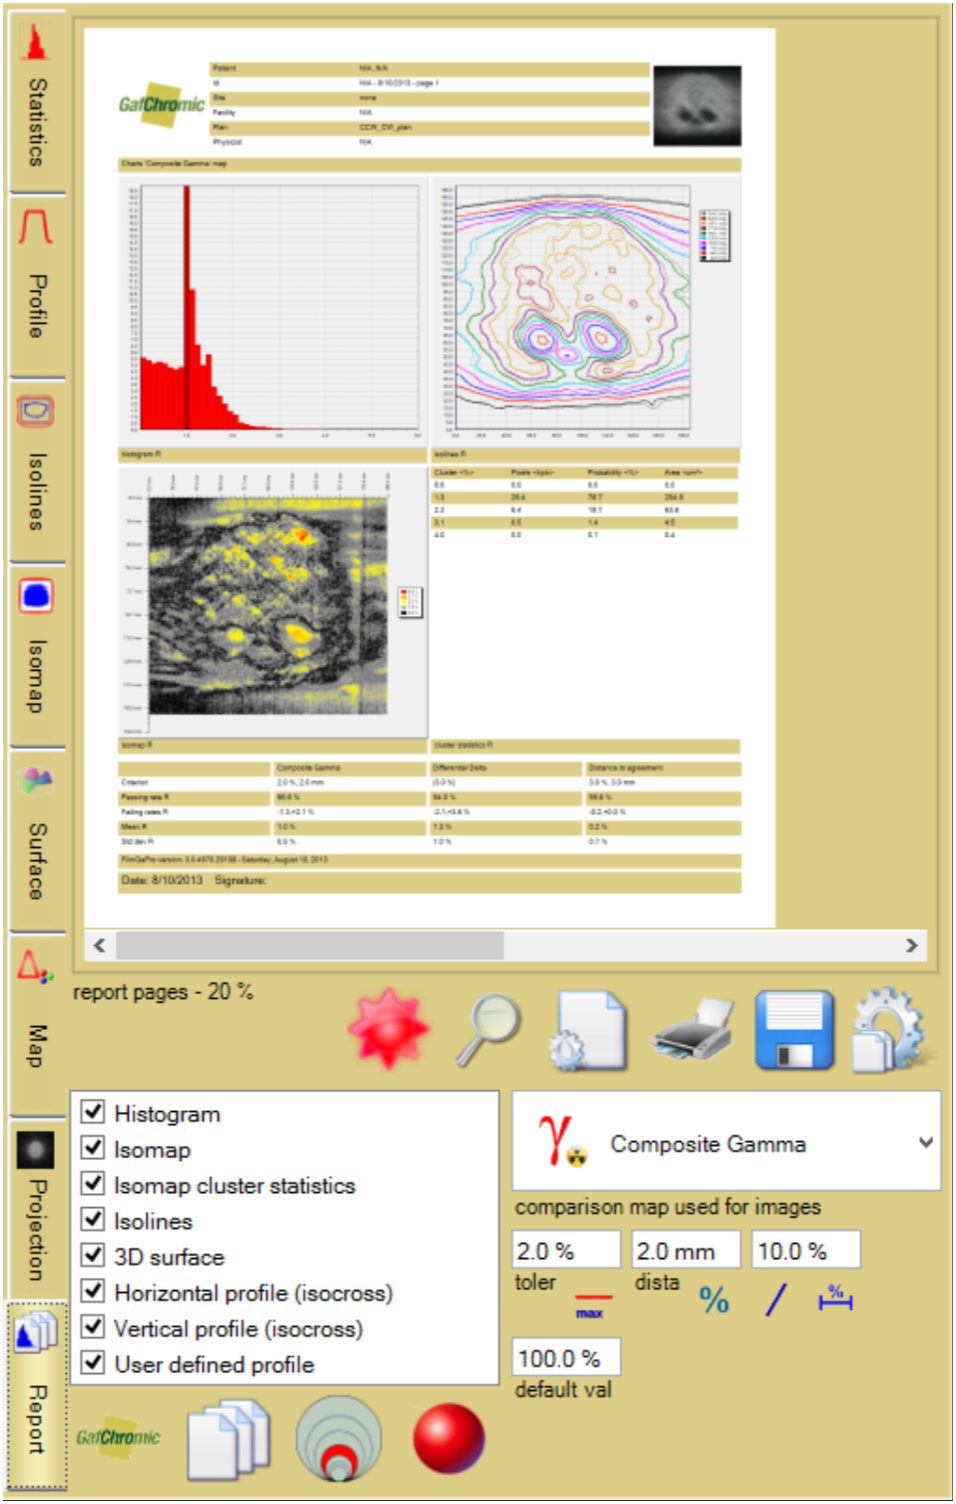
Click  button to update all report settings to current setting of all tabs (right click button for additional options).
Click  button to save report as pdf file or the
  button to print the report.
| Watch demonstration movie |