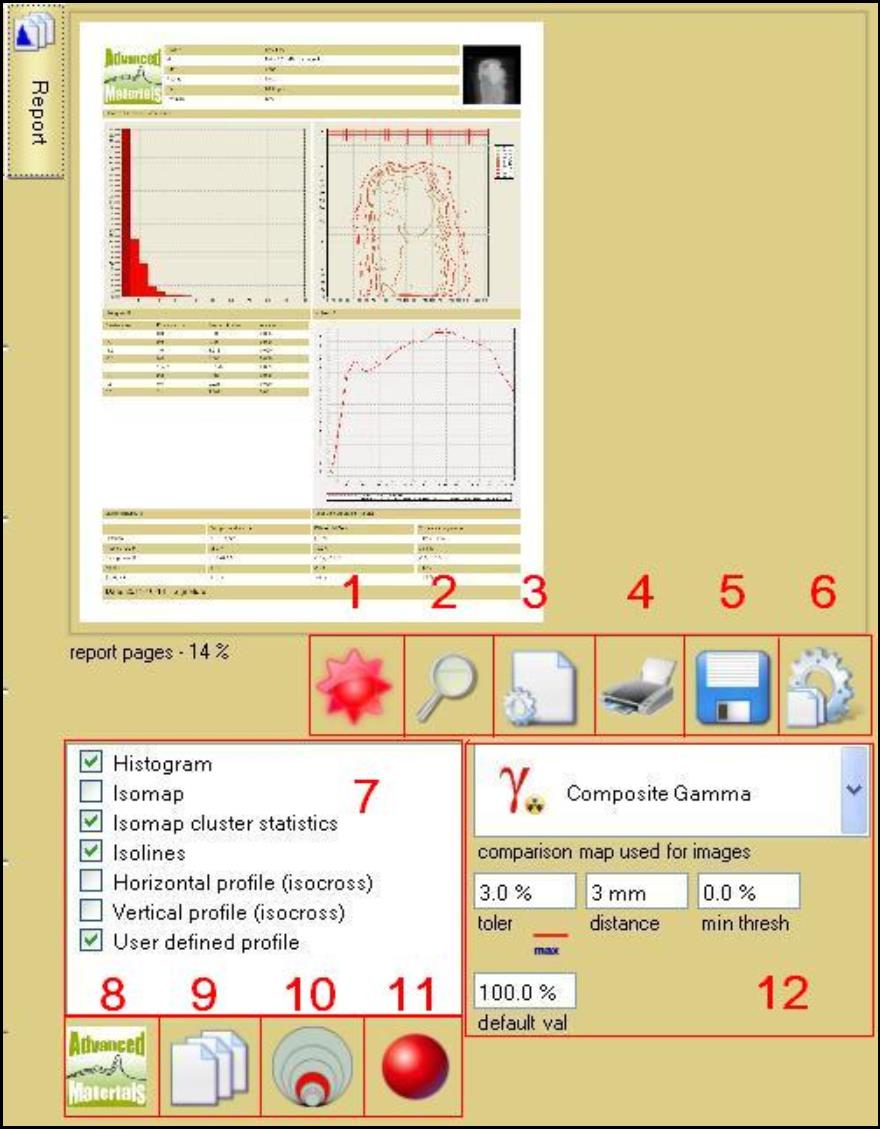
The “Report Panel” is one of the sub-panels of “Film Evaluation Panel” and “Image comparer panel”, use it to assign the report format, customize the details of the evaluation result in the report.
1. Update report: Click this button can update the image showing in the report window.
2. Magnifier: Click this button can scale the views of the report pages.
3. Report options: Click this button to select different report options.

4. Print report: Click this button to open the printer panel.
5. Save report as file: Click this button to save the report as PDF file.
6. Copy setting: Click this button to copy current setting from all image generating controls including: Isolines, Isomaps, Profile and Histogram.
7. Comparison charts: Select the chart types included in the documentation, these will be shown in the report.
8. Left top logo: Click this button to load logo image from file.
9. Force single page output: Click to switch to single page only, select the maximum number of image rows and columns.
10. Image origination size: Click this button to select the image size from 100% to 600%
11. Color channels: Click this button to choose comparison maps for the selected color to be added to the report.
12. Histogram: Choose from “Gamma”, “Dose difference” and “DTA” to select the related histogram added to the report.