Color Translation Maps Editor General color translation maps the image from one color Cold to another Cnew, i.e. Cnew = F(Cold) where C = (R, G, B). The simplest case is that such color translation is linear, i.e. it can be described by matrix of coefficients and the new color components are only a weighted linear combination of the old color values. In this case one can use the “Bitmap Color Translation Editor” to edit the matrix of coefficients.
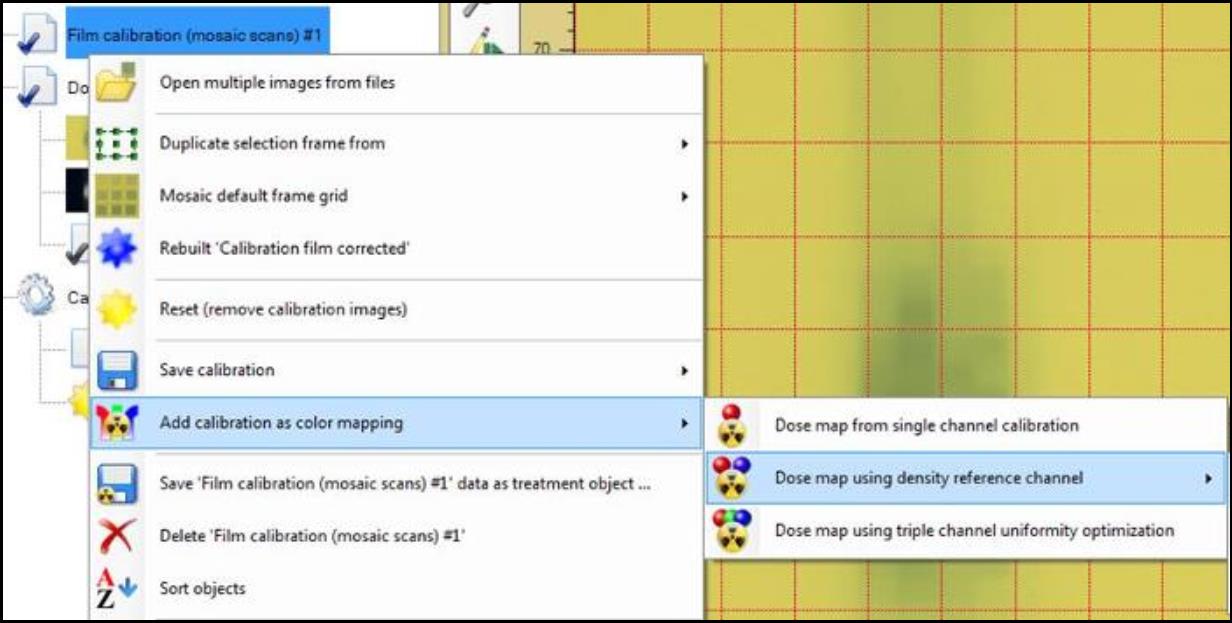
All other color translations belong to the general case where the translation is described by a non-linear function F. One of the methods is to calculate the dose map from the scanned film.
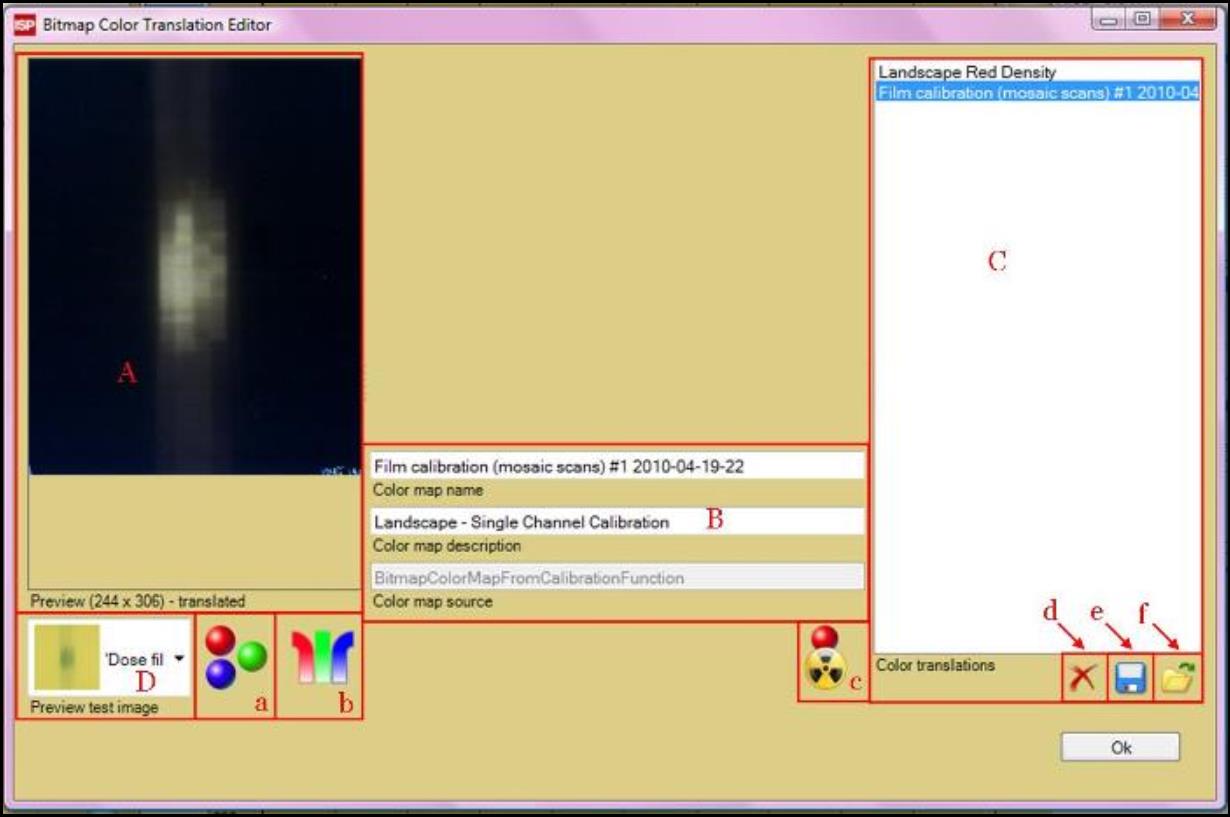
A. The “Preview” panel allows you to view the image before and after the translation is applied. Right click inside the panel to change the displayed color channel and the image size.
B. The windows in box B allow you to change the name, description of the color map and to view the source of it.
C. The “Color translation list” panel shows a list of color translations that are available in “Color translation tool” under “Image Panel”. It allows you to view, select, and delete color translations on the list.
D. The “Image selector” drop down list allows you to select image to test and preview color translation effect in the “Preview” panel, A.
a. “Displayed color selector” button allows you to select the displayed colors and effects in the test image in “Preview” panel, A. Please note that the selection does NOT affect the translation properties but changes how the test image is displayed only. To turn off all the effect and change the view back to all three color channels, click on the icon and select “Normal view.”
b. Click on the icon to turn on and off the color translation on the test image in “Preview” panel, A. The icon appears as  . when the translation is turned on.
c. The icon shown identifies the color translation selected. Click on the button to change the color translation icon from file.
d. The “Delete” button allows you to delete selected color translation on the “Color translation list” panel, C.
e. The “Save” button allows you to save the color translation list on the “Color translation list” panel, C.
f. The “Open” button allows you to open the color translation list saved from file.