Menu

The Menu bar in FilmQA™ Pro allows you to save, open and select the preferred configuration, units, or panels and to generate license data.
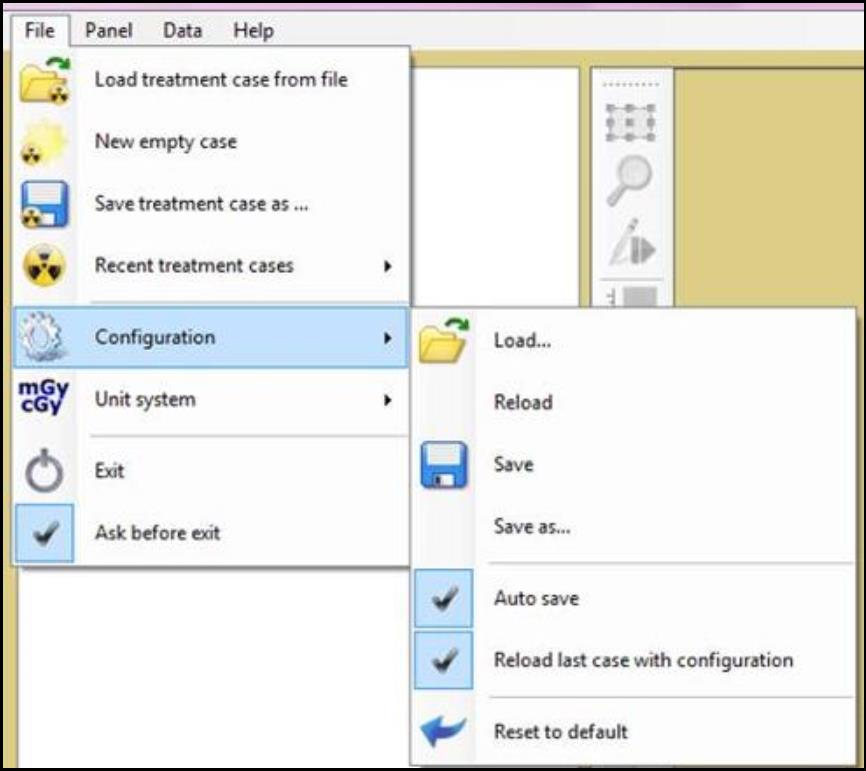
Select “File,” and then:
- “Load treatment case from file” to load the treatment case that’s previously saved.
- “New empty case” to close the treatment case in “Case Data Selector.”
- “Save treatment case as...” to save the treatment case opened as a different file.
- “Recent treatment cases” to open treatment cases that’s recently used.
- Select “Configuration” to load, reload, and save the configuration of the program.
- Check or uncheck the “Auto save” option to save the configuration automatically each time you exit the application.
- Check the “Reload last case with configuration” option to have the treatment case opened with the same configuration that was set last time the case was opened. Uncheck the option to have the case opened with current system configuration
- Select “Reset to default” to reset the configuration to system default.
- Select “Unit system” to load, reload, and save the unit preference set by you.
- Check or uncheck the “Auto save” to save the units automatically each time you exit the application. *
- Check or uncheck the “Load unit standards only” to load only the units set as “standard” and exclude the loading the format of numbers
- Select “Reset to SI” to reset all the units to SI (International System) format.
- Select “Exit” to close FilmQA™ Pro.
- Check “Ask before exit” to have a window pop up asking whether you want to close FilmQA™ Pro when the “Exit” button is clicked.
Select “Panel,” and then:
- Select “Image viewer and editor” to have “Film Evaluation Panel” opened.
- Select “Calibration tool” to have “Calibration Tool Panel” opened.
- Select “Tool management” then
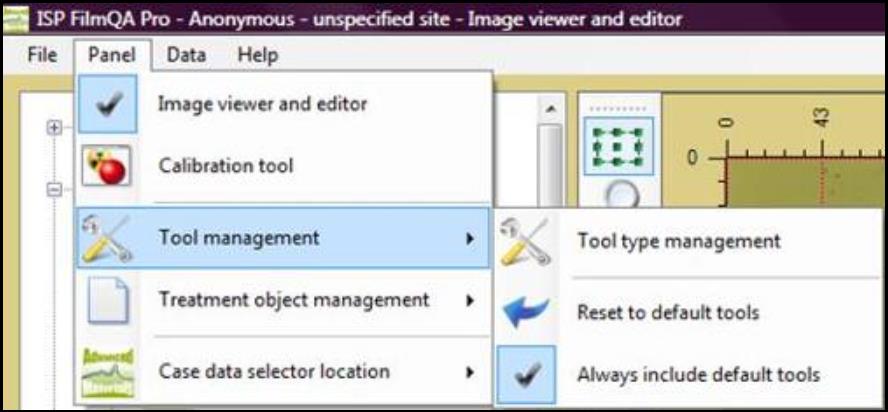
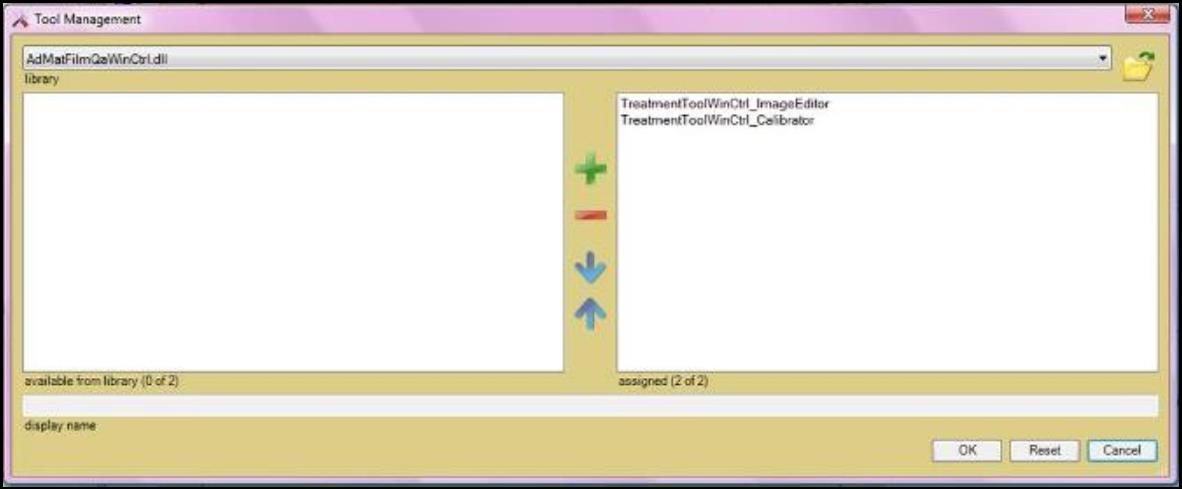
- Select “Tool type management” to open the “Tool Management” window. The window allows you to select the tool set that’s available in the software.
- Select “Reset to default tools” to reset the tool set to system default.
- Select “Always include default tools” to include the system default tool set at all time.
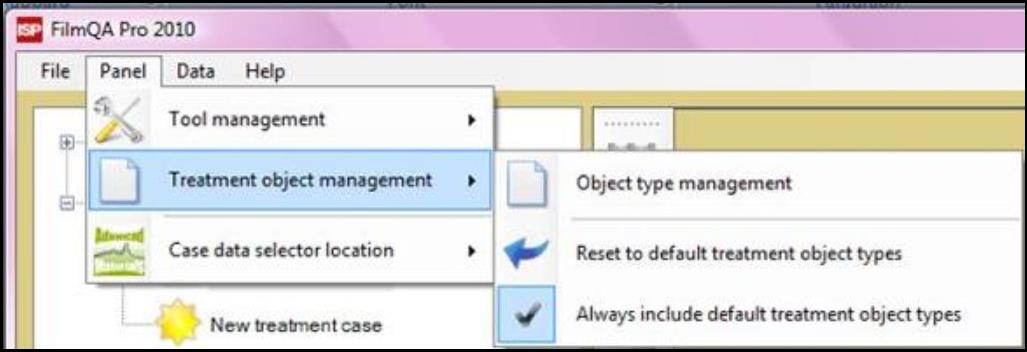
- Select “Treatment object management” then
- Select “Object type management” to open the “Object Management” window. The window allows you to select the objects that are available in the drop down list.
- Select “Reset to default treatment object types” to reset the object list to system default.
- Select “Always include default treatment object types” to include the system default object list at all time.
- · Select “Case data selector location” to change the location of the “Case Data Selector.”
Select “Data,” and then: ·
- Select “Patient data” to open the “Patient Data Window.” The window allows you to add or remove patient data and to create patient list.
- Select “Treatment case data” to open the “Case Data Window.” The window allows you to add or remove treatment case data and to create case lists.
- Select “Scanner data” to open the “Scanner Data Window.” The window allows you to add or remove scanner data and to create scanner lists.
- Select “Units” to open “Units Window.” The window allows you to change the setting and format of units in the software.
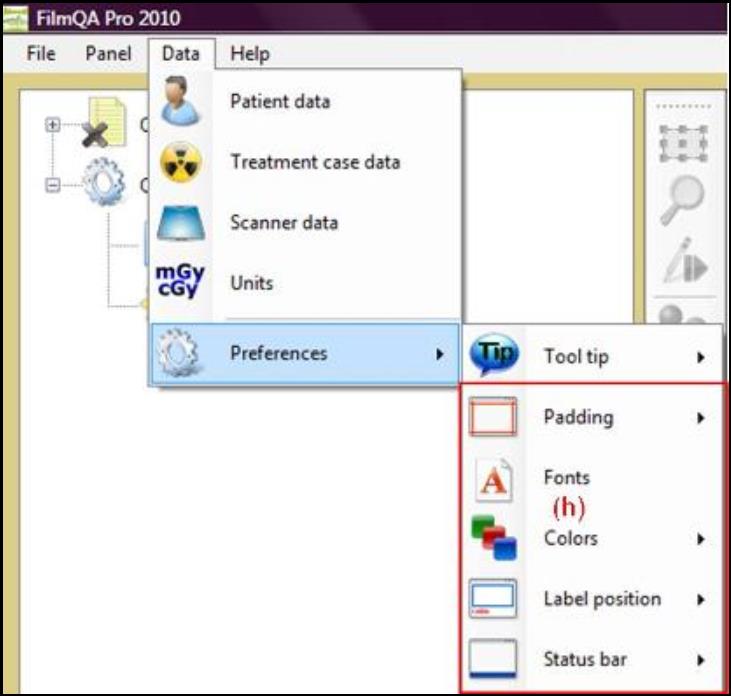
- Select “Preferences” and
- “Tool tip” to hide or show all the tool tips in the software.
- See detailed description for functions of options in box (h) in “Padding” panel.
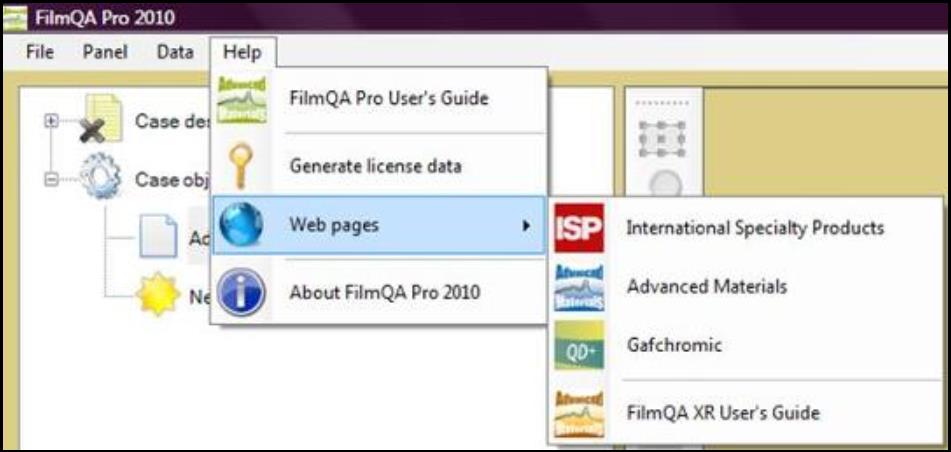
Select “Help” and
- Select “FilmQA Pro User’s Guide” to view the user manual of the software.
- Select “Generate license data” to save or copy the license data. For details of how to obtain a license key for FilmQA™ Pro, see “Installation.”
- Select “Web pages” to view the websites related to this software.
- Select “About FilmQA Pro 2010” to see the information about your FilmQA™ Pro installation, e.g. version number, license ID, license renewal date, etc.